

Estimate floor tiles before you place an order
The floor tile calculator helps you turn room measurements into a practical material estimate. Enter the length and width of the area, the dimensions of one tile, the number of tiles in a box and a waste allowance. The result shows the floor area, the adjusted area, the approximate number of tiles and the number of full boxes to buy.
This is useful when planning tile for a bathroom, kitchen, hallway, entryway, utility room or another indoor floor. Tile is normally sold in complete boxes, and ordering too little can create delays or make it difficult to find the same shade, size variation or production batch later.
- Calculate the rectangular floor area to be tiled
- Add an allowance for cuts, breakage and unusable offcuts
- Estimate the number of individual tiles required
- Convert the tile quantity into complete boxes
- Compare different tile sizes before choosing a product
- Prepare a more realistic material and renovation budget
Measurements and product details you need
Measure the actual floor area that will receive tile rather than relying only on a property plan. If the space is not a simple rectangle, divide it into smaller rectangular sections, calculate each section and combine the areas. Recesses, doorways, fixed units and areas that will not be tiled should be reviewed separately.
Floor tile calculator inputs
| Input | What it represents | What to check |
|---|---|---|
| Room length | One side of the floor area | Measure at floor level and check more than one point if the walls are uneven |
| Room width | The other side of the floor area | Use the area that will actually be covered with tile |
| Tile length | The first dimension of one tile | Enter the value in the unit currently selected in the calculator |
| Tile width | The second dimension of one tile | Use the product's stated dimensions and do not enter the box coverage here |
| Tiles per box | The number of full tiles supplied in one box | Check the product label or retailer specification because pack quantities vary |
| Waste allowance | Extra material added above the measured area | Increase it for diagonal layouts, patterns, many corners or difficult cuts |
Check both the number of tiles and the stated coverage per box on the product packaging. Manufacturer coverage is a useful final check before ordering, especially when nominal tile dimensions differ slightly from the actual product size.
How the floor tile calculation works
The calculator first multiplies room length by room width. It then increases that area by the selected waste percentage. Next, it calculates the area of one tile and divides the adjusted floor area by the tile area. Individual tiles and boxes are rounded up because partial tiles and partial boxes cannot normally be ordered as complete units.
This is an area-based estimate. It does not create a tile layout or model every cut, grout joint, border, niche, step or change in direction. Two rooms with the same area can require different quantities when their shapes and layouts are different.
For diagonal, herringbone, modular or decorative layouts, ask the installer or tile supplier to review the final quantity. Complex patterns can produce offcuts that cannot be reused elsewhere.
Choosing a suitable tile waste allowance
A waste allowance covers edge cuts, damaged pieces, selection around visible defects and offcuts that do not fit another part of the room. The right percentage depends on room shape, tile format, laying pattern and installer plan. The figures below are starting points rather than universal rules.
Indicative waste allowances for floor tile
| Project conditions | Starting allowance | Why it may be needed |
|---|---|---|
| Simple rectangular room with a straight layout | 5–10% | There are relatively few corners and most cuts may be reusable |
| Typical room with doorways, pipes or several corners | Around 10% | More perimeter cuts and small unusable pieces are likely |
| Diagonal or offset layout | 10–15% | Angled and repeated cuts usually create more waste |
| Herringbone, decorative pattern or several connected areas | 15–20% or installer estimate | Pattern alignment and changes in direction can limit reuse of offcuts |
What changes the number of tiles you need
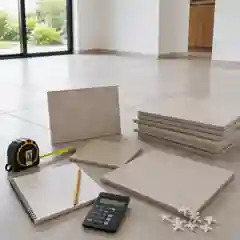
Room area is only the starting point. Tile format, room shape, laying direction and the position of cuts can all affect the final order.
Large-format tiles may leave fewer opportunities to reuse small offcuts, while patterned layouts often require additional pieces for alignment.
Buying the complete quantity at the same time makes it easier to keep the product code, shade and manufacturing batch consistent.
Keeping a small number of unused tiles after installation can also make a future repair easier.
Worked floor tile example
A rectangular room measures 15 × 12 ft. Each tile measures 24 × 12 in, there are 8 tiles in a box and the selected waste allowance is 10%. How many boxes are required?
Answer: The floor area is 180 sq ft. Adding 10% gives an adjusted area of 198 sq ft. One 24 × 12 in tile covers 2 sq ft, so 198 ÷ 2 = 99 tiles. With 8 tiles in each box, 99 ÷ 8 = 12.375. After rounding up, the order estimate is 13 boxes.
Explanation: The result is rounded up twice where necessary: first to a whole tile and then to a complete box. The same method works with metric measurements when all values are entered in the selected unit system.
Common floor tile estimating mistakes
- Ordering only the exact measured area with no allowance for cuts or breakage
- Entering tile dimensions in a different unit from the one selected
- Confusing the dimensions of one tile with the coverage of one box
- Forgetting that the final order must be rounded up to complete boxes
- Assuming every offcut from one edge can be reused elsewhere
- Ignoring doorways, recesses, columns, pipes or changes in floor direction
- Mixing boxes from different shades, production batches or nominal sizes
- Finishing the installation with no spare tiles for future repairs
Before installation, compare the product code and batch information on every box. Tiles sold under the same collection name can still show natural or manufacturing variation.
Other materials and costs to plan
The tile quantity is only one part of the floor project. Adhesive or mortar, grout, surface preparation and finishing details can make a noticeable difference to the total budget. Their quantities depend on the tile type, tile size, joint width, substrate condition and product instructions.
- Tile adhesive or mortar
- Grout and sealant where required
- Primer and surface repair materials
- Waterproofing for suitable wet areas
- Tile spacers, clips or an alignment system
- Edge trims, transitions and thresholds
- Delivery, tools, cutting equipment and waste disposal
Checks to make before buying floor tile
- Confirm the exact area that will be tiled and measure irregular sections separately.
- Choose the laying direction and pattern before setting the final waste allowance.
- Check the tile dimensions, tiles per box and stated box coverage.
- Make sure the tile is intended for the floor and conditions where it will be installed.
- Ask whether the required quantity is available from one compatible batch.
- Inspect delivered boxes for damage and verify product labels before installation.
- Keep the calculator result, product specification and installer estimate together for comparison.
The calculator estimates quantity, not product suitability. Slip resistance, frost resistance, water exposure, substrate preparation and installation requirements should be checked against the manufacturer's guidance and local professional advice.
Floor tile calculator questions
Can I calculate tile for an irregular-shaped room?
Yes, but first divide the room into simple rectangles and calculate the area of each section. Add the section areas before estimating the tile quantity. For curved edges, steps, multiple levels or a detailed pattern, use the result as a starting point and ask an installer to review the layout.
Should I use tiles per box or the coverage printed on the box?
This calculator uses tile dimensions and the number of tiles per box. If the manufacturer also provides coverage per box, compare it with the calculated result before ordering. The packaging and current product specification should be treated as the final source for pack contents.
Does the result include adhesive and grout?
No. The result covers floor area, tiles and boxes only. Adhesive, grout, waterproofing, trims and other installation materials require separate estimates based on the selected products and site conditions.
Is the box estimate exact?
It is a planning estimate based on the values entered. The exact order can change because of room geometry, tile variation, layout, damaged pieces, installer cutting decisions and the actual coverage supplied in each box.
Explore other home renovation calculatorsHow to read your result
Use the floor area to check your measurements, the adjusted area to understand the selected waste allowance, the tile count as an approximate piece requirement and the box count as the practical ordering figure. Before purchase, compare the result with the product's stated box coverage and the planned installation layout.