
In this guide
The most useful renovation plan is not the longest document. It is the one that answers four questions clearly: what is changing, why it is changing, how much can be spent, and what must happen before the next stage can begin.
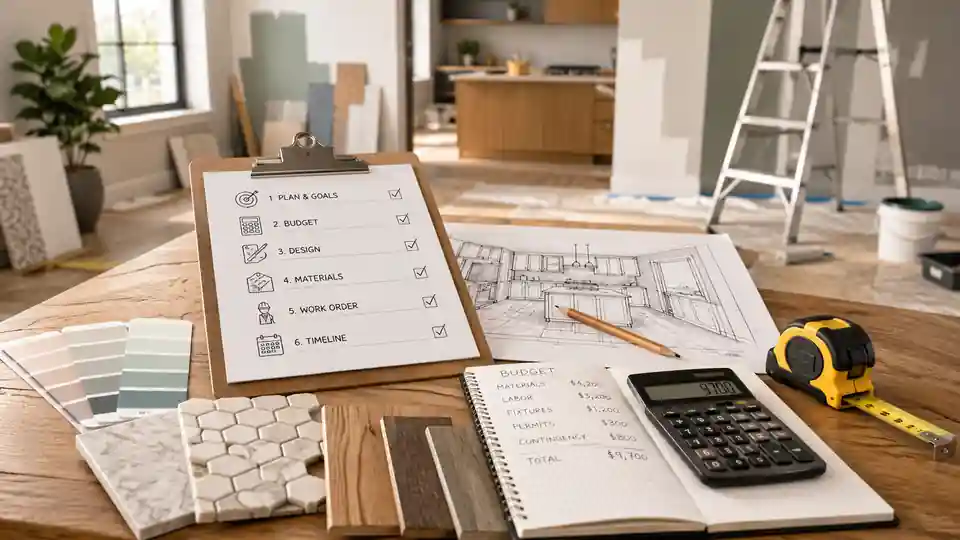
The renovation plan at a glance
A practical order for planning a home renovation
| Stage | Main decision | Useful output |
|---|---|---|
| 1. Define the goal | What problems should the renovation solve? | A list of essential, desirable and optional changes |
| 2. Inspect the property | What conditions or defects may affect the plan? | Measurements, photographs and a risk list |
| 3. Set the budget | What can be spent without relying on optimistic assumptions? | A working budget with a contingency reserve |
| 4. Finalise the layout | Where will walls, furniture, lighting and services be located? | A confirmed plan before technical work starts |
| 5. Arrange the work order | Which tasks depend on earlier tasks? | A sequence from disruptive work to final finishes |
| 6. Choose who does the work | Which jobs need specialists and which are suitable for DIY? | A contractor and responsibility list |
| 7. Build the schedule | When can each stage realistically begin? | A timeline with delivery and drying time included |
| 8. Plan purchases | What should be ordered early and what should wait? | A staged procurement list |
| 9. Prepare the home | How will access, storage, dust and temporary living be managed? | A site preparation and logistics plan |
| 10. Control changes | How will decisions, costs and completed work be recorded? | A change log and final inspection checklist |
Step 1: Define what the renovation must achieve
Start with problems and needs, not colours and products. A renovation should have a reason: repairing damage, improving comfort, creating storage, changing the layout, reducing energy use, making a bathroom easier to use, or preparing a home for long-term living. When the reason is clear, it becomes easier to decide what belongs in the project and what can wait.
- Essential work: safety issues, leaks, damaged surfaces, outdated systems or defects that could worsen.
- Functional improvements: better storage, improved lighting, easier circulation, more practical room use or additional sockets.
- Comfort improvements: insulation, acoustic changes, heating control or better ventilation.
- Visual improvements: paint colours, decorative finishes, fittings and furniture.
- Optional upgrades: features that are attractive but do not solve an immediate problem.
Place every idea into one of these groups. If the available budget cannot support everything, protect the essential and functional items first. This prevents decorative choices from consuming money needed for hidden work.
Use the Renovation Priority Calculator to compare rooms and decide which work should come first.Step 2: Inspect and measure before making promises
A renovation plan is only as reliable as the information behind it. Measure each room, record ceiling heights, mark doors and windows, and photograph existing services, cracks, damp areas, damaged finishes and awkward corners. For an older or previously altered property, it may also be worth checking whether walls are straight, floors are level and previous work has hidden defects.
- Create a simple room-by-room measurement sheet.
- Record the position of radiators, plumbing points, electrical outlets, switches and ventilation openings.
- Note anything that may limit access, delivery or installation.
- Photograph areas before they are covered or dismantled.
- Separate visible defects from suspected defects that still need professional assessment.
Do not treat visual inspection as proof that wiring, plumbing, gas systems, load-bearing elements or waterproofing are suitable. When the renovation affects these areas, a qualified professional should assess the existing condition and verify the proposed work against local requirements.
Step 3: Build a budget that includes more than finishes
A realistic renovation budget should include labour, materials, delivery, removal of waste, tool hire, temporary protection, permits or professional services where required, and a reserve for uncertain work. It should also account for the small items that rarely appear in inspiration photos: adhesives, fixings, sealants, trims, preparation materials, replacement fittings and repeated delivery charges.
A useful way to divide the renovation budget
| Budget group | What it may include | Why it matters |
|---|---|---|
| Essential repairs | Damage repair, moisture problems, unsafe components and failed surfaces | These items can affect the durability of everything installed later |
| Technical work | Electrical, plumbing, heating, ventilation and structural services | Much of this work becomes difficult to change after finishes are complete |
| Preparation | Removal, levelling, plastering, screed, waterproofing and priming | Good finishes depend on suitable preparation |
| Visible finishes | Flooring, tiles, paint, wallpaper, doors, fittings and decorative items | This category is easy to overspend on because every choice is visible |
| Furniture and equipment | Cabinetry, appliances, lighting, storage and move-in items | A room may be renovated but still unusable without these costs |
| Contingency | Unexpected defects, price changes and necessary scope adjustments | It reduces the chance that one surprise stops the whole project |
The contingency amount should reflect uncertainty rather than an arbitrary target. A recently built room with known conditions may need less flexibility than an older property with hidden services, uneven surfaces or previous alterations. Keep the reserve separate from the amount available for upgrades. Otherwise, the contingency tends to become a second decoration budget before the risky work has even started.
Estimate the main cost groups for an individual room with the Room Renovation Estimate Calculator.Step 4: Finalise the layout before technical work begins
The layout controls more than furniture placement. It affects lighting, sockets, plumbing, heating, door movement, storage, tile cuts and the way people move through the home. A late change to the position of a sink, bed, kitchen unit or television can force completed work to be opened again.
- Draw the room dimensions and fixed openings.
- Place the largest furniture and equipment first.
- Check walking routes, door swings and drawer access.
- Mark lighting, sockets, switches, plumbing points and ventilation needs.
- Confirm wall, floor and ceiling finishes only after the functional layout works.
- Freeze the layout before installation work is ordered.
Use three decision gates: layout freeze, services freeze and finishes freeze. Do not move to the next gate until the earlier decisions are recorded. This simple rule reduces rework caused by ideas that arrive after installation has already started.
Step 5: Put the work in the right order
The exact sequence depends on the property and scope, but renovation work usually moves from investigation and disruptive tasks toward preparation, installation and decoration. The main principle is to avoid completing a clean finish before dusty, wet or concealed work has finished around it.
- Confirm the design, scope, budget and responsibilities.
- Complete surveys, specialist checks and required approvals.
- Protect areas that will remain in use.
- Remove unwanted finishes, fittings and non-retained elements.
- Carry out approved structural or layout changes.
- Complete first-stage electrical, plumbing, heating and ventilation work.
- Repair and prepare walls, ceilings and floors.
- Complete waterproofing and other concealed protection systems where required.
- Install major fixed elements, then wall and floor finishes in the appropriate sequence.
- Complete final electrical and plumbing connections through qualified specialists where required.
- Decorate, fit trims and install remaining fixtures.
- Inspect, correct defects, clean and record the completed work.
Drying and curing periods are part of the work order, not empty gaps in the schedule. Screed, plaster, levelling compounds, waterproofing products, adhesives, grout, sealants and paint systems may each require specific conditions and waiting times. Product instructions and site conditions should determine when the next layer can safely be applied.
Step 6: Decide what is DIY and what needs a specialist
DIY can reduce labour costs on suitable tasks, but it can also delay the project or damage materials if the work exceeds the person's skill, tools or available time. Choose DIY work by consequence, not confidence alone. A task is more suitable for a homeowner when errors are visible, reversible and unlikely to affect safety or concealed systems.
A practical DIY decision check
| Question | Lower-risk answer | Higher-risk answer |
|---|---|---|
| Can a mistake be corrected without opening finished work? | Usually yes | No, the work will be concealed |
| Does the task affect safety or legal compliance? | No | Yes or possibly |
| Is specialist testing required? | No | Yes |
| Is the product expensive or difficult to replace? | No | Yes |
| Have you completed a similar task successfully? | Yes | No |
| Can the schedule absorb a slower learning process? | Yes | No |
Electrical installations, gas systems, structural changes, major plumbing work, heating systems and critical waterproofing can involve serious safety, compliance and insurance consequences. The appropriate specialist should inspect, design, install or test these systems as required locally.
Step 7: Turn the work order into a realistic schedule
A renovation schedule should show dependencies, not just dates. Tiling cannot begin before the substrate is ready. Cabinets cannot be measured accurately before walls and floors reach the agreed stage. Final painting may need to wait until the dust-producing work is complete. Write down what each task needs before it can start and what it prevents from starting too early.
- Contractor availability and handover between trades.
- Product lead times and possible delivery delays.
- Drying, curing and acclimatisation periods.
- Inspection or approval stages where applicable.
- Time for corrections after each major stage.
- Days when noisy or disruptive work cannot be carried out.
- A buffer before the planned move-in or room-use date.
Do not schedule every task with no space between stages. A tightly packed plan looks efficient on paper but can collapse when one delivery, inspection or drying period moves by a day.
Step 8: Estimate materials and buy them in stages
Material planning has two separate tasks: estimating quantity and deciding when to purchase. Buying too little can delay the project or create colour and batch differences. Buying too much ties up money, creates storage problems and may leave products that cannot be returned. The safest approach is to calculate from confirmed dimensions, then apply a waste allowance suited to the material and installation pattern.
What to buy early and what usually should wait
| Buy or reserve earlier | Usually wait until details are confirmed |
|---|---|
| Products with long manufacturing or delivery times | Paint colours before final lighting and samples are reviewed |
| Matching items that may be difficult to source later | Flooring before moisture, level and substrate requirements are checked |
| Technical components specified by the installer | Tiles before the final layout, area and waste allowance are calculated |
| Items required for the next confirmed stage | Doors and fitted furniture before finished openings are verified |
| Samples needed for design decisions | Decorative accessories that do not affect installation |
Keep product names, dimensions, batch information, quantities, delivery dates and return conditions in the renovation file. For finishes, retain a small labelled remainder where practical. It can be valuable for future repairs, especially when a colour, pattern or batch is later discontinued.
Step 9: Prepare the home and the people living in it
Renovation planning also includes access, storage, dust, noise, waste and temporary living arrangements. These issues are easy to ignore because they are not part of the finished design, but they strongly affect cost, safety and stress during the work.
- Remove or protect furniture, textiles, electronics and valuables.
- Decide where delivered materials can be stored flat, dry and secure.
- Keep access routes clear for workers and large items.
- Plan waste removal before demolition starts.
- Confirm where water, power and toilet access will remain available.
- Separate children and pets from active work areas.
- Record keys, access times, contact details and emergency procedures.
- If remaining in the home, create at least one clean and functional zone.
Step 10: Control changes and inspect each stage
Changes are common in renovation, but undocumented changes are dangerous for the budget and schedule. Before approving an alteration, record what is changing, why it is necessary, how much it adds or removes, whether it affects other work, and who has approved it. Even a small decision can alter several later tasks.
- Describe the proposed change in writing.
- Check the additional material and labour cost.
- Check whether already purchased products become unusable.
- Check the effect on the schedule and other contractors.
- Confirm technical suitability where relevant.
- Approve or reject the change before work proceeds.
- Update drawings, quantities and the budget.
A worked example: planning a small apartment renovation
How could a homeowner plan a renovation for a small apartment with an outdated bathroom, worn flooring and insufficient storage?
Answer: First, the homeowner separates the project into essential and optional work. The bathroom inspection and any required plumbing, ventilation or waterproofing checks come before decorative choices. The flooring area is measured, but the final product is not ordered until the substrate condition and room transitions are confirmed. Storage is planned on the layout before sockets, lighting and wall finishes are finalised. The budget is divided into technical work, preparation, finishes, furniture and contingency. Long-lead bathroom fittings are reserved after dimensions are checked, while paint and decorative accessories wait until the dusty work is complete.
Explanation: This order protects decisions that are expensive to reverse. The homeowner is not choosing every product at once; each purchase is linked to a confirmed stage. The apartment becomes usable because the plan includes technical work, storage and furniture rather than treating the renovation as a list of surface finishes.
Common renovation planning mistakes
Mistake, consequence and a better approach
| Mistake | Likely consequence | Better approach |
|---|---|---|
| Starting demolition before the full scope is agreed | Hidden dependencies are discovered after work has begun | Inspect, measure and define the retained and removed elements first |
| Using the full budget for quoted work | There is no reserve for defects or necessary changes | Keep contingency separate and reduce optional work if necessary |
| Buying finishes before technical decisions | Products may not fit the final layout or substrate | Confirm dimensions, services and preparation requirements first |
| Choosing contractors only by the lowest price | Scope gaps, exclusions or poor coordination may increase the final cost | Compare like-for-like scopes, responsibilities, timing and evidence of relevant work |
| Changing the layout during installation | Completed work may need to be removed and repeated | Use a formal layout freeze before concealed work starts |
| Ignoring small supporting costs | The budget is gradually consumed by deliveries, fixings, protection and waste | Track all project costs, not only major products and labour |
| Skipping stage inspections | Problems are covered by later work and become harder to correct | Check each concealed or critical stage before it is closed |
Your pre-renovation checklist
- The purpose and priority of the renovation are written down.
- Room measurements, photographs and visible defects are recorded.
- Specialist checks are arranged for relevant technical or structural work.
- The budget includes labour, preparation, delivery, waste and contingency.
- The layout works with furniture, access, lighting and services.
- The main work sequence and dependencies are agreed.
- DIY tasks and professional responsibilities are clearly separated.
- Long-lead products are identified, but uncertain finishes are not ordered too early.
- Storage, access, dust control and temporary living arrangements are planned.
- A written process exists for changes, payments and stage inspections.
Save the checklist, measurements, quotations, drawings, receipts, product instructions, photographs and change records in one renovation file. A well-organised record helps with coordination during the project and with maintenance or repairs later.
Frequently asked questions
What is the first thing to do when planning a home renovation?
Define the problems the renovation must solve and separate essential work from visual improvements. Do this before choosing materials or requesting incomplete quotations. A clear scope makes every later decision more accurate.
Should I set the budget before speaking to contractors?
Set an initial spending limit and priority list first, then use contractor quotations and technical findings to refine the budget. Avoid presenting the entire available amount as money that must be spent. Keep a separate reserve for uncertainty.
How far in advance should renovation materials be ordered?
Order according to lead time and decision certainty. Products needed for a confirmed near-term stage or made to order may need early reservation. Products that depend on final measurements, substrate condition or colour decisions should wait until those details are verified.
Can I renovate one room at a time?
Yes, but first check whether technical work should be coordinated across several rooms. Replacing wiring, plumbing routes, heating components, flooring transitions or doors room by room can create duplicated labour or inconsistent results if the whole-home plan is not considered.
How can I stop the renovation budget from growing?
Freeze major decisions before installation, compare quotations using the same scope, record every change, buy from confirmed measurements and protect the contingency reserve. Budget growth is often caused by accumulated small changes rather than one dramatic mistake.
Do I need a professional renovation plan?
A simple decorative update may be planned by the homeowner, but professional input becomes increasingly important when the project changes the layout, structure, electrical system, plumbing, gas, heating, ventilation, waterproofing or other regulated work. The right level of professional involvement depends on the property, project and local rules.
Conclusion
To plan a home renovation step by step, begin with the result the home needs, inspect the existing condition, protect the budget and confirm the layout before technical work starts. Then organise the work by dependencies, decide who is responsible for each task, calculate materials from final measurements and record every change. This approach does not remove every surprise, but it makes surprises easier to manage without losing control of the entire project.