
In this guide
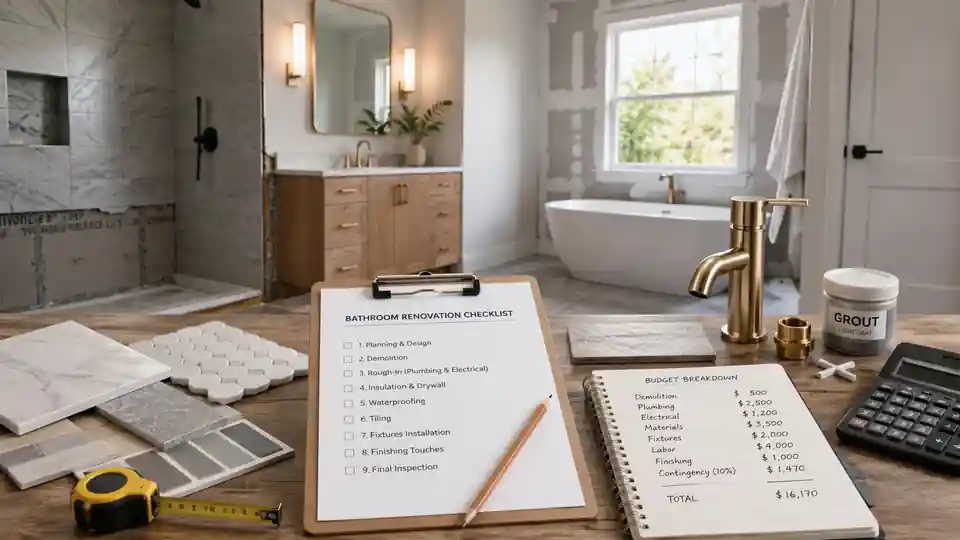
A bathroom renovation is a chain of dependent decisions: the room must be measured before fixtures are ordered, fixtures must be selected before pipe and cable positions are finalised, and hidden work must be checked before walls and floors are closed. This checklist brings the budget, materials and work order into one plan so that a bathroom remodel is easier to price, schedule and inspect.
This is a general planning guide for an international audience. Plumbing, electrical, ventilation, waterproofing and structural requirements vary by location, building type and product system. Use the checklist to prepare questions and estimates, then confirm technical decisions with qualified local professionals.
Bathroom renovation checklist at a glance
The safest way to control a bathroom project is to treat each phase as a handover point. Do not move to the next phase simply because a contractor is available; move forward when the previous work has been checked, photographed where useful and accepted.
Main renovation phases and their required outputs
| Phase | What should be completed | Do not proceed until |
|---|---|---|
| 1. Scope and survey | Room measurements, defects, layout options and project limits | You know what will stay, move or be replaced |
| 2. Budget and specification | Material level, fixture list, labour quotes and contingency | The planned total is affordable |
| 3. Design and ordering | Confirmed product dimensions, delivery dates and compatible components | Critical products are available or firmly scheduled |
| 4. Strip-out | Safe isolation, controlled removal and inspection of hidden conditions | Unexpected damage has been assessed |
| 5. First fix | Plumbing, electrical and ventilation routes | Positions and tests have been checked |
| 6. Substrates and waterproofing | Stable surfaces and a complete compatible waterproofing system | Required curing and inspections are complete |
| 7. Finishes | Tiles, grout, paint and ceiling finishes | Surfaces are ready for fixtures without damage |
| 8. Second fix and handover | Sanitaryware, fittings, accessories, testing and cleaning | Leaks, drainage, ventilation and electrical work have been verified |
1. Define the scope before choosing finishes
Start by deciding whether the project is a cosmetic refresh, a partial renovation or a full strip-out. Replacing a vanity and repainting dry areas is a different project from moving a toilet, rebuilding a shower or repairing a damaged floor. A clear scope prevents attractive finishes from consuming money needed for hidden work.
Persistent moisture, soft flooring, stained ceilings below the bathroom, damaged wiring, structural movement or a sewage smell should be investigated before the finish schedule is approved. Covering the symptom can turn a small repair into a much more expensive reopening of the room.
2. Build a realistic bathroom renovation budget
Bathroom renovation costs depend heavily on local labour rates, room condition, product quality and how much plumbing or electrical work changes. Instead of relying on a universal price per square metre or square foot, build the budget from quantities, product selections and written local quotations.
Budget categories to include
| Category | Include | Main cost drivers |
|---|---|---|
| Survey and design | Measurements, drawings, specialist checks and approvals where required | Layout changes, building type and project complexity |
| Removal and disposal | Protection, isolation, demolition, transport and waste fees | Heavy finishes, limited access and hidden damage |
| Plumbing and drainage | Pipework, valves, wastes, traps, testing and installation labour | Moving fixtures, concealed systems and poor existing services |
| Electrical and ventilation | Lighting, outlets where permitted, controls, fans, heating and testing | New circuits, long cable routes and access restrictions |
| Substrates and waterproofing | Boards, levelling, membranes, tapes, primers and compatible accessories | Damaged walls, uneven floors and the size of wet zones |
| Finishes | Wall and floor tiles, grout, sealant, paint, trims and profiles | Coverage area, tile format, pattern and wastage |
| Fixtures and furniture | Toilet, basin, vanity, bath, shower, taps, screens, mirrors and storage | Brand, installation type, dimensions and special finishes |
| Contingency | Money reserved for unknown or changed conditions | Age of the room, incomplete records and how much is concealed |
A contingency of about 10–20% of the planned project cost is a useful starting point for many renovations. An older bathroom, an unknown subfloor or major service changes may justify a larger reserve. Keep the contingency separate instead of spending it on upgrades before demolition.
How can a contingency be added without using country-specific prices?
Answer: If measured materials and confirmed quotations total 8,000 in your chosen currency, a 15% contingency is 1,200. The working budget becomes 9,200.
Explanation: The reserve does not predict the final cost. It protects the project from discoveries such as damaged pipework, unsuitable substrates or additional preparation.
3. Measure the room and confirm product dimensions
Room dimensions are only the first layer of measurement. The installer also needs product dimensions, connection points, door movement, clearances and finished surface levels. A toilet that fits on a drawing may still conflict with a door, radiator, shower screen or vanity drawer.
- Measure the floor length and width in metres and feet, including recesses and boxed-in sections.
- Measure each wall separately and record the planned tile or paint height.
- Record door and window openings, sill heights and the direction in which doors open.
- Mark existing hot water, cold water, waste, ventilation and electrical positions.
- Check the exact installation dimensions for the toilet, basin, vanity, bath, shower tray, screen and taps.
- Allow for the thickness of boards, waterproofing, adhesive, tiles and finished flooring.
- Check access routes so that large products can reach the bathroom before ordering them.
Use nominal room measurements for early planning, but order from verified site measurements and the latest manufacturer drawings. Product photographs are not reliable dimensional references.
4. Bathroom renovation materials checklist
A complete materials list includes more than visible finishes. The hidden layers must be compatible with one another, and small items such as valves, wastes, trims and fixings can stop the whole job if they are missing.
Materials and products by system
| System | Typical items to plan | Checks before purchase |
|---|---|---|
| Protection and removal | Dust sheets, floor protection, containers, blades and waste bags | Safe use, access and disposal rules |
| Plumbing | Pipes, fittings, isolation valves, traps, wastes, connectors and supports | Sizes, materials, pressure rating and fixture compatibility |
| Electrical and ventilation | Cables, boxes, controls, lighting, fan, duct and grilles | Local requirements, wet-area suitability and qualified installation |
| Walls and floor | Backer boards or suitable plaster systems, fasteners, levelling products and primers | Moisture suitability, load capacity and manufacturer instructions |
| Waterproofing | Membrane, corner tape, collars, reinforcing fabric and system primer | One compatible tested system and correct coverage |
| Tiling | Tiles, adhesive, grout, spacers, levelling clips, trims and movement-joint sealant | Substrate, tile material, format, joint width and wet-area rating |
| Painting | Moisture-suitable primer and paint for approved dry areas and ceilings | Substrate condition, ventilation and stated coverage |
| Fixtures | Toilet, basin, vanity, bath or shower, taps, screen, mirror and accessories | Dimensions, connection layout, service access and spare parts |
| Finishing and testing | Sanitary sealant, backing cord, access panels, labels and cleaning products | Compatibility, curing time and maintenance instructions |
Buy or confirm these items before first fix
- Products that determine pipe, waste, electrical or ventilation positions.
- Concealed frames, in-wall valves, shower channels and built-in mixers.
- Baths, shower trays and screens with fixed installation dimensions.
- Tiles or other finishes when their thickness affects levels and transitions.
- Special-order items with long or uncertain delivery times.
- Compatible waterproofing and tiling components from the chosen system.
Avoid buying these too early
- Decorative accessories before the final layout and storage needs are confirmed.
- Large quantities of grout or sealant before tile joints, colours and product compatibility are known.
- Furniture that has not been checked against the finished wall thickness and plumbing positions.
- Short-return-window products that cannot be inspected or safely stored before installation.
- Extra upgrades that consume the contingency before the room has been opened.
5. Correct bathroom renovation work order
The exact sequence can change with the building, selected systems and contractor method, but the dependency is consistent: design before routing, routing before closing, preparation before waterproofing, waterproofing before finishes, and testing before handover.
- Survey the room, define the scope and investigate known defects.
- Prepare the layout, product schedule, budget and local approvals where required.
- Confirm critical fixtures and manufacturer installation dimensions.
- Protect access routes and isolate relevant water and electrical supplies.
- Remove old fixtures and finishes in a controlled sequence.
- Inspect exposed walls, floors, services and structural elements.
- Complete first-fix plumbing, drainage, electrical and ventilation work.
- Test hidden services and photograph their locations before covering them.
- Repair, strengthen and level the floor, walls and ceiling substrates.
- Install and cure the specified waterproofing system.
- Lay tiles and complete approved painted or other finished surfaces.
- Install sanitaryware, furniture, taps, screens, lighting and accessories.
- Seal movement and perimeter joints with the correct flexible products.
- Test water flow, drainage, leaks, ventilation, electrical work and access panels.
- Complete cleaning, documentation and the final defect check.
The work order protects hidden work
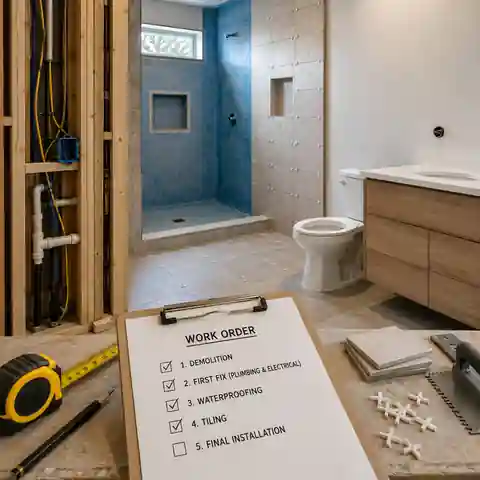
A finished tile surface can hide pipework, cables, fasteners and waterproofing details that are expensive to reach later.
Photographs with measurements can help locate concealed services, but they do not replace required tests or inspections.
Each installer should know which surface, connection or component they are accepting from the previous trade.
Do not rush curing times simply to recover a delayed schedule.
Survey, design and approvals
Agree the layout before any concealed work begins. The plan should show fixture positions, door movement, storage, lighting, ventilation, finished floor levels and service access. Confirm whether the project needs building management approval, permits or specialist design in the local jurisdiction.
- Check that the chosen layout leaves usable space around fixtures.
- Confirm that drainage routes can achieve the required fall without weakening structural elements.
- Plan access to valves, traps, pumps, concealed cisterns and serviceable components.
- Coordinate mirror, vanity, tap, lighting and outlet positions on the same elevation.
- Record who is responsible for each drawing, measurement and final approval.
Isolation, strip-out and inspection
Controlled removal reveals the real condition of the room. Photograph existing routes and open only what is necessary until the condition of the floor, walls and services is understood. A full demolition carried out before the project is ready can leave the household without a bathroom for longer than expected.
Older finishes, boards, adhesives, insulation or pipework may contain hazardous materials or require specialist handling. Stop work if an unknown material, unsafe service or structural problem is exposed, and arrange an appropriate local assessment.
First-fix plumbing, electrical and ventilation
First fix places the hidden services that the finished bathroom will use. This stage must follow the selected products rather than approximate assumptions. Even two similar wall-hung toilets or shower valves can require different frames, depths and connection positions.
- Install or alter water supplies, isolation valves, drainage and vent connections.
- Set shower outlets, bath fillers, basin supplies and wastes to manufacturer dimensions.
- Provide secure supports for wall-mounted fixtures, grab rails and heavy furniture.
- Install permitted lighting, controls, heating and other electrical provisions.
- Complete ventilation ducting with a practical route to the correct discharge point.
- Pressure-test or leak-test plumbing and carry out required electrical checks before closing surfaces.
Do not use an online guide or calculator as approval for wet-area electrical work, gas work, structural drilling or changes to shared building services. These decisions require local rules, suitable equipment and qualified people.
Substrate repair, levelling and preparation
Waterproofing and tile adhesive are not substitutes for a weak or moving base. Walls and floors must be suitable for the selected finish, correctly fixed, sufficiently flat and prepared with compatible primers or levelling materials.
- Repair water damage and identify why it occurred.
- Replace unsuitable or deteriorated boards and timber.
- Confirm that the floor can support the planned build-up and finishes.
- Create the required falls in shower areas without producing unsafe transitions.
- Check wall flatness for large-format tile and furniture installation.
- Clean, dry and prime surfaces as required by the chosen system.
Waterproofing and water management
A bathroom is not protected by one visible bead of sealant. Water management depends on the complete assembly: suitable substrates, sealed penetrations, corners, junctions, falls, drains, membranes and movement joints. Use one compatible system and follow its coverage, thickness, overlap and curing instructions.
The required waterproofed areas and inspection methods differ between locations and systems. Do not assume that the whole room or only the shower must be treated in the same way everywhere. Confirm the design locally and keep product records before the work is covered.
Tiling, grout and painted surfaces
Plan tile setting-out before mixing adhesive. The position of the first tile controls cut sizes, grout lines, niches, trims and the visual relationship between walls and floor. Dry areas and ceilings that will be painted should use products suitable for the substrate and expected moisture.
- Choose a starting layout that avoids very narrow cuts in prominent positions.
- Confirm whether wall or floor tiling comes first for the selected method and protection plan.
- Use adhesive and grout compatible with the tile, substrate, wet area and heating system where present.
- Keep movement and perimeter joints free for the specified flexible treatment.
- Allow for pattern matching, directional tiles, breakage and future spare tiles.
- Protect completed surfaces from following trades and heavy fixtures.
Second fix, sealing and final installation
Second fix connects and secures the visible products. Protect finished surfaces, use the correct fixings and avoid puncturing concealed waterproofing or services. The installer should be able to explain how serviceable parts can be reached later.
- Install the toilet, basin, vanity, bath, shower fittings and screens.
- Fit lighting, controls, fan grilles, mirrors, storage and accessories.
- Use appropriate seals, washers and flexible sealant at specified junctions.
- Keep access panels usable and identify isolation valves.
- Adjust doors, drawers and screens so that they do not conflict.
- Remove protective films at the correct stage and inspect finishes in good light.
Testing and handover
- Run each tap and shower through normal operating conditions.
- Fill and drain the basin, bath or shower area while checking visible connections.
- Flush the toilet repeatedly and check stability, fill and drainage.
- Confirm that water drains without persistent ponding or overflow.
- Check ventilation operation and the practical airflow path into the room.
- Obtain required electrical test information and operating instructions.
- Check sealant continuity, grout defects, damaged tiles and unfinished edges.
- Record product models, warranties, spare materials and maintenance requirements.
Carry out the final inspection before the last payment or formal handover. Small defects are easier to discuss while the room, documents and responsible trades are still available.
Use decision gates instead of relying only on dates
A calendar can show when work is planned, but a decision gate shows whether the room is ready. This prevents one delayed or incomplete stage from being hidden by the next trade.
Practical hold points for the project
| Before this work starts | Check these conditions | Useful record |
|---|---|---|
| Closing walls or floors | Routes, supports, tests and product positions are confirmed | Dated photographs with measurements |
| Waterproofing | Substrates are stable, clean, dry and properly prepared | Product batch and system details |
| Tiling | Waterproofing is complete, cured and accepted | Coverage notes and inspection record |
| Installing fixtures | Tiles and finishes are cured, protected and accurately drilled | Fixture drawings and fixing locations |
| Final handover | Water, drainage, ventilation and electrical checks are complete | Test results, warranties and snag list |
Where bathroom renovation schedules commonly slip
- Fixtures are chosen after pipe and cable positions have already been installed.
- Special-order products arrive late, damaged or with missing components.
- Demolition reveals wet timber, corroded pipes or an unsuitable subfloor.
- Different trades work from different drawings or measurements.
- Levelling, waterproofing, adhesive, grout or sealant curing times are shortened.
- Tiles run out because openings, cuts, pattern direction or wastage were underestimated.
- Changes are approved verbally without recording the cost or schedule effect.
- The only bathroom is removed before temporary arrangements and all critical materials are ready.
Common bathroom renovation mistakes
Mistake, consequence and better approach
| Mistake | Likely consequence | Better approach |
|---|---|---|
| Choosing finishes before solving moisture problems | New surfaces may fail or conceal continuing damage | Investigate the source and repair the assembly first |
| Moving every fixture without a clear benefit | Higher plumbing, drainage and reinstatement cost | Compare the existing layout with the practical gain |
| Ordering from room area alone | Too few tiles, wrong furniture size or blocked clearances | Measure each surface and confirm product drawings |
| Mixing unrelated waterproofing components | Uncertain compatibility and difficult warranty evidence | Use a complete specified system |
| Closing hidden work without records | Expensive investigation during future repairs | Test, photograph and measure concealed routes |
| Spending the contingency on upgrades | No reserve when demolition reveals damage | Keep contingency outside the finish allowance |
| Ignoring ventilation | Persistent humidity, condensation and mould risk | Plan extraction and replacement airflow as a system |
| Treating sealant as permanent waterproofing | Failed joints can admit water behind finishes | Build the correct layers and maintain flexible joints |
Worked example: measuring tile for a small bathroom
A bathroom is 2.4 m by 1.8 m (about 7 ft 10 in by 5 ft 11 in). Tiles will cover the floor and the walls to a height of 2.1 m (about 6 ft 11 in). How can an early quantity be estimated?
Answer: Floor area: 2.4 × 1.8 = 4.32 m², or about 46.5 sq ft. With 10% added for cuts and breakage, the early floor allowance is about 4.75 m², or 51 sq ft. Wall area before openings: the 8.4 m perimeter × 2.1 m height = 17.64 m², or about 190 sq ft. After subtracting a 1.6 m² door opening and adding 10%, the early wall allowance is about 17.6 m², or 190 sq ft.
Explanation: This is a planning estimate, not an order quantity. The final number must reflect each opening, tile size, layout, pattern, breakage risk, box coverage and the supplier's rounding rules.
Do not use tile area as a shortcut for the full renovation cost. Labour, preparation, plumbing, ventilation, waterproofing, fixtures and access conditions can affect the budget more than the visible floor area.
Final bathroom renovation quality checklist
- The agreed scope, layout and product schedule match the installed room.
- Doors, drawers, screens and fixtures move without collisions.
- Visible tile cuts, grout lines, trims and edges are acceptably aligned.
- No tile sounds loose or shows unexplained cracks or damage.
- Sealant is continuous at specified joints and has not been substituted for grout everywhere.
- Water reaches the outlets at the expected flow and temperature.
- Basins, showers, baths and toilets drain correctly without leaks.
- The floor and shower area manage water as designed without persistent unwanted ponding.
- Ventilation operates and air can enter the room when the door is closed.
- Accessible valves, traps, filters and service panels can still be reached.
- Electrical work has the required local testing or certification.
- Product instructions, warranties, photographs and spare tiles are stored together.
- A written snag list records any unfinished or damaged item and who will correct it.
Frequently asked questions
How much contingency should a bathroom renovation have?
Around 10–20% of the planned cost is a common starting range, but the right reserve depends on uncertainty. Older rooms, concealed leaks, an unknown subfloor, major layout changes or incomplete service records can justify a larger allowance.
Should wall tiles or floor tiles be installed first?
Both sequences are used. The decision depends on the waterproofing system, tile layout, installer method and how completed surfaces will be protected. Agree the sequence before setting-out so that joints, cuts and finished levels coordinate.
Can the toilet or basin stay during renovation?
It may be possible during a limited cosmetic project, but a full renovation usually requires access behind and below fixtures. Keeping them in place can obstruct preparation, waterproofing and floor finishes, so the practical benefit should be compared with the limitations.
When should bathroom fixtures be ordered?
Select and technically confirm fixtures before first fix because their dimensions control connections and supports. Schedule delivery according to lead time, storage space, damage risk and the retailer's inspection and return periods.
Does the whole bathroom need waterproofing?
There is no universal answer for every location, building and system. Wet zones, floors, junctions and penetrations often have specific requirements, but the exact extent must follow local rules, the design and the selected waterproofing manufacturer's instructions.
How long does a bathroom renovation take?
A straightforward renovation is usually measured in weeks rather than a few days, but no single duration is reliable. Design changes, approvals, product lead times, hidden damage, trade availability and curing periods can all extend the programme.
How much extra tile should be ordered?
A simple layout may begin with roughly 10% extra, while diagonal layouts, patterns, large formats, complex niches or fragile tiles may need more. Calculate wall and floor areas separately, then round up to full boxes and retain useful spare tiles.
Plan the room before opening it
A successful bathroom renovation is not just a sequence of trades. It is a series of verified decisions: define the scope, measure accurately, confirm fixtures, protect the contingency, inspect hidden work and move forward only when each layer is ready. That approach cannot remove every surprise, but it makes costs, materials and responsibilities much easier to control.
Start a structured bathroom budget with the Bathroom Renovation Calculator