
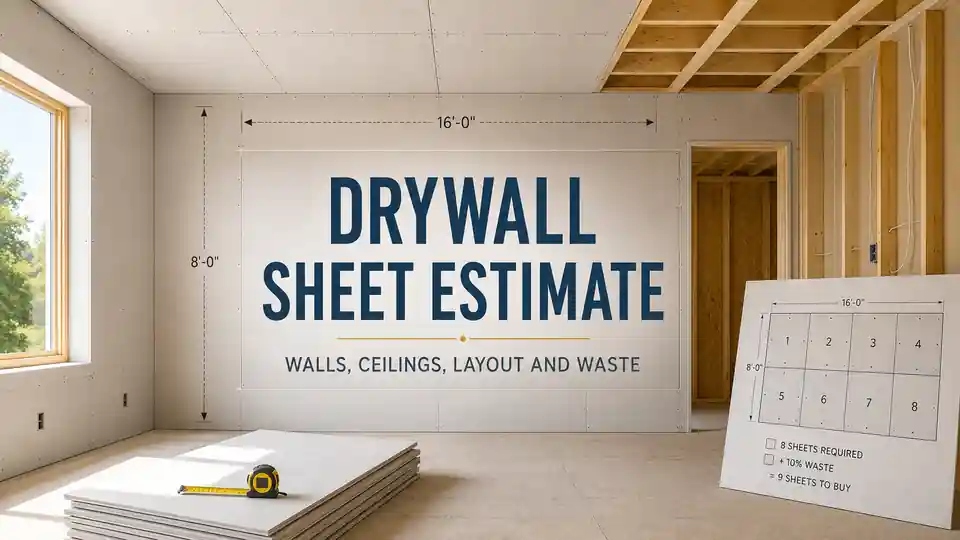
The number of drywall sheets needed for a room is not simply the floor area divided by the area of one board. Walls and ceilings must be measured separately, substantial openings may be deducted, multiple board layers must be counted, and the final result has to be rounded up to whole sheets. A layout that creates many narrow cuts can also require more material than a clean area calculation suggests.
Quick method: calculate the net area of every surface, multiply by the number of board layers, add a cutting and damage allowance, divide by the area of one sheet, and round up. Then check the result against an actual board layout before ordering.
Coverage of common drywall and plasterboard sheet sizes
| Sheet size | Area of one sheet | Planning note |
|---|---|---|
| 1200 × 2000 mm | 2.40 m² | Shorter format that may be easier to move through restricted access |
| 1200 × 2400 mm | 2.88 m² | Widely used metric format for walls and ceilings |
| 1200 × 2500 mm | 3.00 m² | Can suit common room heights where locally available |
| 1200 × 3000 mm | 3.60 m² | May reduce some joints but is longer and more difficult to handle |
| 4 × 8 ft | 32 ft² | Common imperial sheet size |
| 4 × 10 ft | 40 ft² | Longer sheet with fewer possible end joints |
| 4 × 12 ft | 48 ft² | Useful for some long walls but heavy and awkward in restricted spaces |
These are common examples rather than a universal product list. Actual widths, lengths, thicknesses, edge profiles and specialist board types vary by manufacturer and market. Confirm the exact product available from the supplier before doing the final calculation.
In this guide
The estimate has three different numbers
A useful drywall plan separates measured area from adjusted purchase area and from the final number of sheets. Treating these as the same number is a common source of confusion.
Measured area, purchase area and sheet count
| Stage | What it represents | Why it matters |
|---|---|---|
| Net surface area | Walls and ceilings that will actually receive board after appropriate deductions | This is the geometric starting point |
| Adjusted board area | Net area multiplied by board layers and increased by the selected allowance | This accounts for multiple layers, cuts and possible damage |
| Whole sheets to buy | Adjusted area divided by one sheet area and rounded up | Suppliers sell complete sheets, not the exact mathematical fraction |
Why can a small increase in wall length add a complete sheet?
Answer: A wall measuring 4.8 m long and 2.4 m high can be covered by four vertical sheets measuring 1.2 × 2.4 m. If the wall becomes 4.9 m long, the clean area increases by only 0.24 m², but a fifth sheet may be needed to provide the final 100 mm strip.
Explanation: Area calculations describe material quantity in theory. Whole-sheet purchase and the positions of cuts determine whether an apparently small extra area can be supplied from a useful offcut or requires another board.
Measure walls and ceilings as separate surfaces
For a simple rectangular room, gross wall area can be found from the room perimeter multiplied by wall height. For an irregular room, hallway, recess or partition, measure every wall section separately and add the results. The ceiling is normally calculated from its own length and width.
- Record the length and height of each wall that will receive board.
- Measure the ceiling separately, including any sections at different levels.
- List large doors, windows and open sections that will not be boarded.
- Note whether walls and ceilings use the same board type and thickness.
- Record the number of board layers for each surface.
- Choose only sheet sizes that are actually available and can reach the room.
Do not use the floor area as a shortcut for wall quantity. A 15 m² bedroom may have more than 40 m² of wall surface before doors and windows are deducted.
Basic area formulas
For one rectangular wall: wall area = wall length × wall height. For all four walls of a rectangular room: gross wall area = 2 × (room length + room width) × wall height. For a flat rectangular ceiling: ceiling area = room length × room width.
When a wall has several heights, slopes or step changes, divide it into rectangles and triangles that can be measured reliably. Do not force a complex surface into one approximate rectangle if the difference could change the final sheet count.
Which openings should be deducted?
Large doors, windows and open passages can reduce the net boarded area. Small electrical boxes, pipe penetrations and similar cut-outs normally do not save a meaningful amount of sheet material, because the board still has to span the surrounding wall and the cut-out itself creates work and waste.
Practical treatment of common openings
| Opening or detail | Usually deduct? | Reason |
|---|---|---|
| Full door opening | Yes | A substantial section of wall receives no board |
| Large window | Usually yes | The opening may remove enough area to affect the quantity |
| Wide open doorway or arch | Yes, after measuring the actual open area | The missing wall section is significant |
| Socket, outlet or switch box | No | It does not normally reduce the number of full sheets |
| Small pipe or cable penetration | No | The surrounding sheet is still required |
| Window and door reveals | Measure separately if they will be boarded | Deducting the main opening does not automatically include its returns |
An opening can reduce square metres or square feet without reducing the final number of boards. The saved area matters only when the surrounding offcuts can be used elsewhere in the layout.
Calculate walls and ceilings step by step
The most reliable manual method is to calculate each material group separately. If the walls use standard board and the ceiling uses a different thickness or performance board, they are two orders even when their dimensions are identical.
- Add the gross area of all walls in one material group.
- Deduct the measured area of substantial openings.
- Add the ceiling or calculate it as a separate group.
- Multiply each group by its number of board layers.
- Add the selected cutting and damage allowance.
- Divide by the area of the sheet that will actually be purchased.
- Round every separate product group up to a whole sheet.
- Check the result with a simple board layout and adjust if necessary.
How many 1200 × 2400 mm sheets are needed for a 4.2 × 3.6 m room with 2.7 m walls?
Answer: Gross wall area is 2 × (4.2 + 3.6) × 2.7 = 42.12 m². A 0.9 × 2.1 m door and a 1.5 × 1.2 m window total 3.69 m², leaving 38.43 m² of net wall area. With a 10% allowance: 38.43 × 1.10 = 42.27 m². One 1200 × 2400 mm sheet covers 2.88 m², so the wall estimate is 42.27 ÷ 2.88 = 14.68, rounded up to 15 sheets. The ceiling is 4.2 × 3.6 = 15.12 m². With the same allowance: 15.12 × 1.10 ÷ 2.88 = 5.78, rounded up to 6 sheets. The area-based total is 21 sheets.
Explanation: Walls and ceiling were rounded separately because they may create different cut patterns. If they use different board products, they must also be ordered separately. A final layout may show that one more sheet is sensible or that a reusable offcut reduces the practical requirement.
The HomDera drywall calculator is designed for walls. It accepts separate wall dimensions, deductions for substantial openings, sheet size, orientation, layers and a waste allowance. Calculate ceilings as a separate surface using the method in this guide.
Why board layout can change the purchase
Two projects with the same net area can use different numbers of sheets. A long uninterrupted wall may accept repeated full boards, while a room with short returns, boxed sections, several openings and changing heights can create many offcuts that are the wrong shape for the next surface.
Layout details that area alone cannot resolve
| Detail | Possible effect | Planning response |
|---|---|---|
| Board orientation | Changes the direction and length of joints and the shape of offcuts | Compare practical vertical and horizontal layouts, then follow the selected system requirements |
| Framing and edge support | May prevent a mathematically efficient cut from being installed as drawn | Confirm that board edges and joints are supported as required |
| Staggered joints in multiple layers | Reduces the chance that every offcut can be reused in the same position | Sketch each layer rather than simply copying the first |
| Doors and windows | Create narrow strips, L-shaped cuts and pieces with limited reuse | Mark opening positions on the layout |
| Different board types | Offcuts from one product cannot replace another | Keep standard, moisture-resistant, fire-resistant and acoustic boards in separate totals |
| Room access | A large sheet may not pass through a stair, doorway or turn | Check the delivery route before choosing the format |
The layout with the fewest joints is not automatically the correct installation. Framing direction, supported edges, fastening requirements, staggered joints and any tested wall or ceiling system instructions take priority over a simple material-saving sketch.
Choose sheet size with transport and installation in mind
Longer sheets may reduce some joints and offcuts, but they are heavier, harder to turn in corridors and more difficult to install on ceilings. A smaller sheet can be less efficient on paper yet more practical in an occupied home, upper floor, narrow stairwell or room with limited working space.
Smaller and longer boards compared
| Consideration | Smaller or shorter board | Longer board |
|---|---|---|
| Handling | Usually easier to carry and position | More awkward and may require additional people or lifting equipment |
| Transport through the building | More likely to pass through restricted access | May not turn through stairs, corridors or doorways |
| Joint count | Can create more joints | Can reduce some end joints on long surfaces |
| Offcut flexibility | Smaller pieces may fit short wall sections | Large offcuts are useful only when another matching section is available |
| Ceiling work | Easier to manoeuvre but creates more joints | Potentially fewer joints but substantially harder to support and position |
Before ordering a longer board because it reduces two joints, check whether it can actually reach the room without being bent, damaged or introduced through an opening that is smaller than the sheet.
How much waste allowance should you add?
There is no single waste percentage that fits every project. The allowance covers cutting, damaged edges, pieces that cannot be reused and normal measurement or installation uncertainty. It should not be used to hide poor measurements or replace a layout.
Illustrative planning allowances
| Project condition | Possible starting range | Why |
|---|---|---|
| Long, simple surfaces with a planned layout | About 5–7% | Repeated full sheets and reusable cuts may keep waste low |
| Typical room with several openings | About 8–10% | Allows for ordinary cuts, minor damage and whole-sheet rounding |
| Many corners, recesses or short wall sections | About 10–15% | Offcuts are less likely to fit another location |
| First-time DIY work or uncertain site conditions | Around 12–15% or a layout-based extra sheet | Cutting mistakes and damaged edges are more likely |
| Complex shapes or several separate board products | Determine from a detailed layout | A single percentage can conceal very different waste patterns |
These ranges are planning examples, not installation rules. A supplier, contractor or board layout may justify a different allowance. The final order should also consider whether another delivery would be expensive and whether unused full sheets can be returned under the supplier's terms.
Multiple layers and specialist boards need separate totals
A two-layer wall normally requires approximately twice the board area of a one-layer wall, but the board layout is not necessarily duplicated. Joints may need to be staggered, concealed layers may use different boards, and the fixing and joint-treatment requirements can differ between systems.
- Multiply the measured surface by the number of layers assigned to that surface.
- Separate products by type, thickness, width and length.
- Do not use an offcut from standard board to replace moisture-resistant, fire-resistant, acoustic or impact-resistant board.
- Confirm whether concealed-layer joints require treatment in the selected system.
- Treat fire, moisture and acoustic performance as properties of the complete tested or approved assembly, not of the sheet count alone.
A quantity estimate does not specify a fire-rated, moisture-resistant or acoustic wall. Board type, framing, insulation, joint treatment, fasteners, sealing and layer arrangement must match the required system and local rules.
Ceilings deserve their own board plan
Ceiling area may be easy to calculate, but ceiling installation is not simply a wall turned sideways. Board thickness and type, framing direction, support spacing, sheet orientation, access and lifting method can all differ. A large board that is manageable on a wall may be impractical overhead.
- Calculate every ceiling level or bulkhead separately.
- Verify that the selected board is approved for the ceiling system and support spacing.
- Mark lights, access panels, beams and other large interruptions on the layout.
- Plan how the sheets will enter the room and be supported during installation.
- Keep ceiling offcuts separate from wall assumptions until their dimensions and board product are confirmed.
Do not attempt to hold and fasten a large ceiling board alone if it cannot be controlled safely. Drywall and plasterboard sheets are heavy and awkward; use suitable lifting equipment or enough competent help, and follow the manufacturer's handling guidance.
A final board-layout check before ordering
A simple scale sketch can catch problems that a calculator cannot see. It does not need to be a professional drawing, but it should show each wall or ceiling as a rectangle with openings, board direction and the main cuts.
- Draw each wall and ceiling surface separately with its dimensions.
- Mark doors, windows, openings, changes in height and different board products.
- Place full sheets according to the intended orientation and system requirements.
- Check that joints and board edges have the required support.
- Label useful offcuts and identify where they can realistically be reused.
- Repeat the sketch for additional layers where joints must be staggered.
- Compare the layout count with the area-based estimate.
- Add a sensible reserve only after the main cutting pattern is understood.
- Confirm stock, access, delivery and return conditions before placing the order.
Do not forget the rest of the drywall order
The sheets are only one part of the purchase. A practical order may also include joint tape, joint or jointing compound, suitable fasteners, corner or angle bead, primer, sealants required by the system, protective materials, delivery and safe lifting arrangements.
Items to verify after the sheet count
| Item | What to check | Common oversight |
|---|---|---|
| Joint tape and compound | Joint length, finishing method, number of coats and whether concealed layers are treated | Assuming the same consumption for every finish level and installer |
| Fasteners | Board thickness, framing material, layer arrangement and system fixing schedule | Treating a rough screw count as an installation specification |
| Corner or angle bead | External corners, reveals and exposed edges | Expecting joint tape alone to cover every corner detail |
| Primer | Finished-face area and product coverage | Using board area across all layers instead of only the exposed face |
| Delivery and handling | Sheet length, weight, storage space, stairs, lifts and door openings | Choosing the most efficient board on paper but being unable to move it safely |
Common drywall estimating mistakes
Mistake, consequence and better approach
| Mistake | What goes wrong | Better approach |
|---|---|---|
| Using floor area for wall quantity | Wall material is seriously understated | Measure wall lengths and heights separately |
| Stopping after area ÷ sheet area | Whole-sheet rounding and unusable cuts are ignored | Add an allowance, round up and check a layout |
| Deducting every small opening | The calculation suggests savings that do not exist in full sheets | Deduct substantial openings and leave small service cut-outs in the area |
| Combining all boards into one total | Different thicknesses and specialist products become mixed | Round each product group separately |
| Forgetting additional layers | The sheet and fastener order may be far too small | Assign layers to every wall and ceiling group |
| Selecting a size that is not stocked locally | The calculated quantity cannot be purchased as planned | Confirm actual supplier formats before the final estimate |
| Assuming every offcut is reusable | The order runs short when pieces are the wrong shape or product | Reuse only offcuts that fit a named location in the layout |
| Ignoring access and handling | Sheets arrive but cannot safely reach the work area | Check the route and lifting plan before ordering |
Technical references used for this guide
This guide uses the same general estimating principles found in manufacturer tools: calculate the relevant surface, select a real board format, recognise that waste and jobsite conditions change the result, and follow the installation requirements of the selected system. Product availability and technical requirements vary by market.
CertainTeed Drywall Calculator: panels, joint materials and jobsite-condition noteCertainTeed: factors affecting horizontal or vertical board orientationKnauf Wallboard: example product variants, dimensions and applicationsGypsum Association: gypsum board construction and manufacturing standardsBritish Gypsum: guidance on safer plasterboard handling and installationQuestions people ask before ordering drywall
How many 4 × 8 ft drywall sheets are needed for a 12 × 12 ft room?
With an 8 ft ceiling, the four walls have 384 ft² of gross area. If one door and two windows total 45 ft², the net wall area is 339 ft². Adding 10% gives 372.9 ft², which is 11.65 sheets of 32 ft², rounded up to 12 sheets for the walls. Adding the 144 ft² ceiling and applying the same allowance gives a combined area-based estimate of about 17 sheets, provided the same board product is suitable for both surfaces. A layout may change the practical order.
Is a 10% drywall waste allowance always enough?
No. Ten percent is a useful starting point for many ordinary rooms, but simple repeated surfaces may need less and complex rooms may need more. Openings, short returns, several board products, restricted access and installation experience all affect waste. A board layout is more dependable than choosing a percentage without looking at the room.
Should doors and windows be subtracted from drywall area?
Substantial doors, windows and open passages can normally be deducted. Small sockets, switches and pipe holes should usually remain in the area because they do not remove a full board section. Remember to add window or door reveals separately when they will also be boarded.
Can wall and ceiling sheets be added into one total?
Only after they have been calculated separately and confirmed as the same product, thickness and size. Ceiling boards may have different technical requirements, and wall offcuts may not suit the ceiling layout. Separate rounding gives a safer estimate.
How do two drywall layers affect the quantity?
For a preliminary area estimate, multiply the relevant surface by two before adding the allowance and dividing by sheet area. The final layout should account for staggered joints, different boards in each layer and any system-specific joint-treatment and fastening requirements.
Does the HomDera drywall calculator include ceilings?
The current calculator estimates wall boarding. It accepts multiple walls, openings, board size, orientation, layers and an allowance, and also gives planning estimates for tape, compound, screws and primer. Calculate the ceiling separately from length × width and apply the appropriate board product, layers and allowance.
The practical answer
To estimate drywall sheets, measure each wall and ceiling rather than starting from floor area. Deduct only substantial openings, separate different board products, multiply by the required layers, add a realistic cutting allowance, divide by the actual sheet area and round up. That gives a useful shopping estimate. Before ordering, draw a simple board layout, verify support and system requirements, check whether the sheets can reach the room, and confirm that useful offcuts really have somewhere to go.