
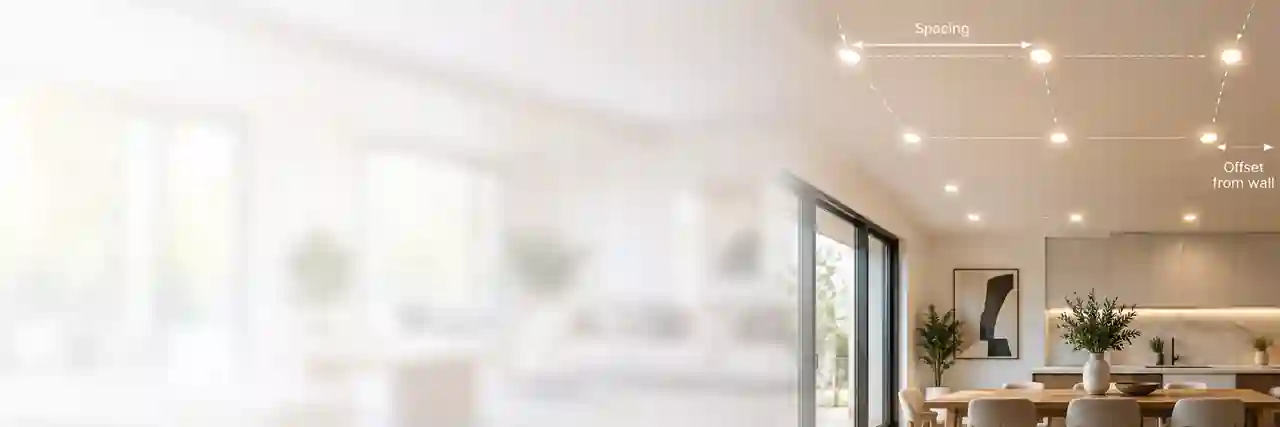
Recessed lighting calculator for count, spacing and a centered ceiling plan
A useful recessed lighting calculator has to solve two different questions: how much light the room needs and how to distribute the fixtures across the ceiling. HomDera checks both. It estimates a minimum count from room area and fixture lumens, checks that the grid does not exceed the selected center-to-center spacing, and then draws a symmetric reflected-ceiling-style plan.
The same tool can be used as a can light calculator, pot light calculator or downlight spacing calculator. The vocabulary changes between the United States, Canada, the UK, Ireland, Australia and New Zealand; the layout geometry does not.
- fixture count for a rectangular room
- rows and columns matched to the room proportions
- center-to-center spacing in both directions
- half-spacing offsets from the perimeter walls
- total installed fixture lumens
- target and estimated average light level
- a scaled ceiling diagram and a table of fixture-center coordinates
This is a first-pass ambient-lighting plan, not a final lighting design. Accent lighting, kitchen counters, vanities, artwork, desks and other visual tasks should be considered separately instead of forcing one ceiling grid to do every job.
Why fixture count and spacing should be checked separately
A lumen calculation can say that four downlights are enough for the selected average light level, while a four-light grid may still leave the fixtures too far apart for the beam distribution. The opposite can happen too: a spacing rule may produce a neat grid, but low-output fixtures may not provide enough light. The calculator uses the larger requirement and tells you which side controlled the final count.
Inputs that make the result more useful
What to enter before planning the ceiling
| Input | Why it matters | Best source |
|---|---|---|
| Room length and width | Sets floor area and grid proportions | Measure the finished room |
| Ceiling height | Provides the reference for an automatic spacing check | Finished floor to the fixture plane |
| Room type | Loads a practical ambient-light preset | Choose the closest use, then override if needed |
| Lumens per fixture | Controls how many fittings are needed for brightness | Use the actual fixture data sheet or package |
| Light-loss allowance | Adds headroom for real-world losses and ageing | Keep the default for planning or edit deliberately |
| Spacing factor | Creates an automatic maximum spacing from ceiling height | Use as a starting point, not a code rule |
| Maximum center spacing | Overrides the automatic spacing when you have better fixture data | Manufacturer photometric guidance or a lighting plan |
| Custom illuminance | Lets you replace the room preset | Use lux or foot-candles from your own design target |
The lumen side of the calculation
Lumens describe the light leaving the fixture. Illuminance describes how much light reaches an area: lux is lumens per square metre, while one foot-candle is one lumen per square foot. The calculator converts between lux and foot-candles automatically when you switch unit systems.
required fixture lumens = room area × target illuminance ÷ light-loss factor

brightness count = ceil(required fixture lumens ÷ lumens per fixture)
The room presets are intentionally treated as planning targets rather than universal standards. Published residential recommendations vary by task, viewing conditions and measurement plane. A kitchen prep counter and general kitchen floor, for example, are not the same lighting problem.
The spacing side of the calculation
The automatic spacing check starts from a ceiling-height multiplier, but it is editable because there is no single correct “half the ceiling height” rule for every recessed light. Real fixtures have different beam distributions, trims, apertures and photometric spacing criteria. If a manufacturer provides a maximum spacing or a designer has specified one, enter that value and let it override the rule of thumb.
Photometric reports for real downlights can include a spacing criterion. That value is fixture-specific. Treat generic internet spacing charts as rough planning aids, not a replacement for the photometric data of the fitting you are actually installing.
How the centered grid is built
Once the minimum count is known, the calculator tests whole-number row and column combinations. It prefers a grid that stays within the maximum spacing, uses at least the required number of lights and follows the room proportions without creating unnecessarily uneven cells.
actual spacing along length = room length ÷ columns
wall offset at each end = actual spacing ÷ 2

actual spacing across width = room width ÷ rows
side-wall offset = actual spacing ÷ 2
That half-cell method creates a balanced plan: the first light is half a grid cell from one wall, the last light is half a grid cell from the opposite wall, and the spacing between all intermediate centers is equal.
Worked example: 14 × 12 ft living room
How many recessed lights for a 14 × 12 ft room with an 8 ft ceiling and 800-lumen fixtures?
Answer: With the default 0.75 ceiling-height spacing reference, the preliminary maximum spacing is 6 ft. A 14 × 12 ft room therefore needs at least a 3 × 2 grid to stay within that spacing, giving six fixtures. The actual center spacing becomes about 4.67 ft along the 14 ft direction and 6 ft across the 12 ft direction. The first centers sit at roughly 2.33 ft and 3 ft from the adjacent walls.
Explanation: The final count is not produced by square footage alone. The lumen estimate and the spacing check are compared, and whichever requires more fixtures controls the first-pass layout.
Kitchen recessed lighting: the grid is only the background layer
Bathroom downlights need the right product rating
Brightness is only one part of a bathroom plan. A fixture may need an appropriate damp- or wet-location rating depending on its exact position, and local electrical rules determine what equipment is permitted in defined bathroom zones. A calculated dot on the ceiling does not make an unsuitable fitting safe.
This calculator does not approve a fixture for a shower, size wiring or breakers, verify grounding/earthing, select RCD/GFCI protection, or determine local bathroom zones. Follow the listed fixture instructions and the electrical requirements that apply where the project is installed.
IC, airtight and wet-location labels are separate from layout
Recessed products can carry different construction and location ratings. For example, current ENERGY STAR listings include recessed downlights described as Type IC, IC Airtight, damp-location rated or wet-location rated. Those labels answer installation questions; they do not change the arithmetic of the ceiling grid, and the exact product documentation should control the final selection.
Ceiling joists and services can force a layout change
The diagram assumes an unobstructed ceiling. The real ceiling may contain joists, trusses, resilient channels, pipes, ducts, wiring, sprinkler heads, smoke alarms, access panels and structural members. Mark all proposed centers first, verify the cavity, then revise the whole grid if one position must move.
Before cutting the first hole
| Check | Why |
|---|---|
| Joists or framing | The housing or junction box may not fit at the calculated center |
| HVAC ducts and plumbing | A clear ceiling surface does not mean the cavity is empty |
| Existing wiring | New openings must not damage concealed cables |
| Smoke alarms and sprinklers | Clearances and coverage requirements are separate from lighting layout |
| Cabinets and furniture | A mathematically centered light can still be visually or functionally misplaced |
| Fixture depth and driver box | Slim wafer lights and traditional cans have different cavity needs |
When a dimmer makes sense
A spacing-driven grid can deliver more lumens than the room preset requires. That is not automatically a mistake: a denser pattern can improve uniformity. If the selected LEDs and controls are compatible, dimming provides a practical way to keep the geometry while tuning the actual light level for evenings, screen use or different activities.
Common recessed lighting calculator mistakes
Mistake, consequence and better check
| Mistake | What goes wrong | Better approach |
|---|---|---|
| Using watts instead of lumens | Modern LED wattage does not directly describe light output | Enter listed fixture lumens |
| Treating ceiling height ÷ 2 as a law | Beam distributions vary widely | Use fixture photometrics when available |
| Counting lights from square footage only | A low-output and high-output fixture get treated as identical | Combine area with actual lumens |
| Putting the first row at the full spacing distance from the wall | The perimeter becomes much darker or visually uneven | Start from roughly half the actual cell spacing for a centered grid |
| Ignoring the room plan | Lights land over cabinets, behind people or on top of pendants | Overlay the layout on furniture and task zones |
| Cutting before checking the ceiling cavity | The ideal center may contain a joist or duct | Mark and inspect every location first |
Related HomDera electrical calculators
Check wire size and voltage drop separately with the Cable Size CalculatorEstimate combined household demand with the Apartment Electrical Load CalculatorFrequently asked questions
How far apart should recessed lights be?
There is no universal spacing that fits every recessed light. Ceiling height gives a useful planning reference, but beam angle and photometric distribution matter more. Use the calculator’s automatic spacing only as a first pass, or enter a manufacturer/design maximum spacing when you have one.
How far should can lights be from the wall?
For a simple centered ambient grid, the first fixture center is commonly positioned at half the actual grid spacing. Accent lighting and wall washing are different design tasks and may deliberately use another offset.
How many recessed lights do I need per square foot?
A fixed lights-per-square-foot rule is too crude because fixture output varies. Two 600-lumen lights and two 1,200-lumen lights do not produce the same result. Use room area, a light-level target and the actual fixture lumens, then verify spacing.
Can I use this for pot lights in Canada or downlights in the UK?
Yes. Select metric or imperial units and enter the actual fixture output. “Can light”, “pot light”, “recessed light” and “downlight” overlap in everyday use, although product construction and local installation requirements differ.
Does fixture diameter decide spacing?
Not by itself. Aperture size can correlate with output and optics, but two fixtures with the same nominal diameter can have very different lumen packages and beam distributions. Use the photometric information for the exact model whenever possible.
How to use the final ceiling plan
Start with the count and grid shape, then read the actual center spacing and wall offsets. Use the coordinate table to mark a paper plan or transfer centers to the ceiling. Finally, compare every mark with framing, services, furniture and the fixture manufacturer’s photometric and installation data. That last check is what turns a clean mathematical grid into a buildable lighting layout.
HomDera provides a planning estimate, not a permit, electrical design or photometric guarantee. Final recessed-light locations and electrical work should be verified for the selected fixtures, the real building and the rules that apply in your location.